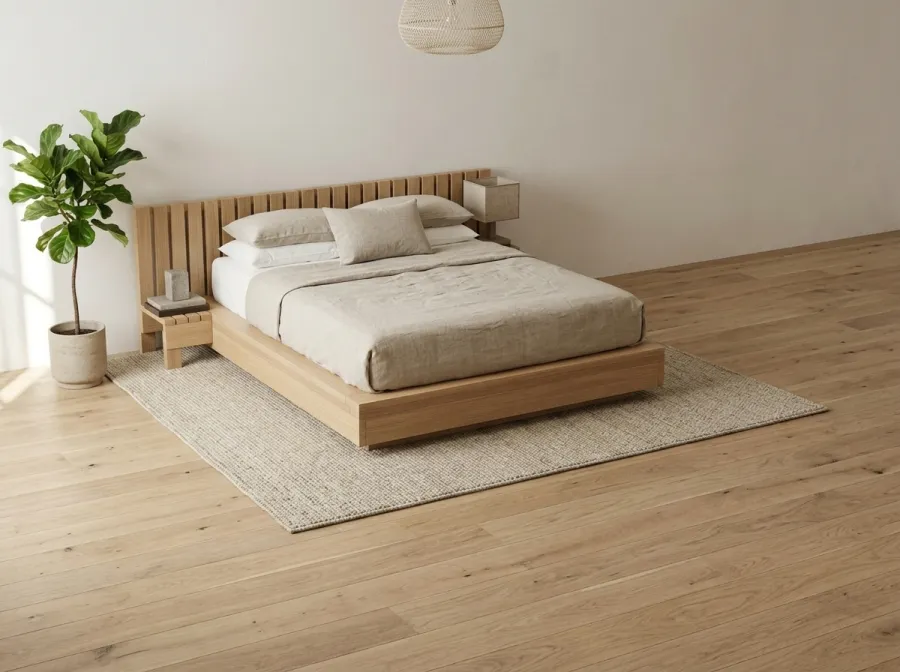
DIY Platform Bed Frame: How to Build a Low Floating Queen (and Other Sizes)
A DIY platform bed frame from 2x4s, 2x6s and 1x4s: slats, center beam, headboard, queen dimensions and an honest note on storage. Step-by-step overview.
A DIY platform bed frame is one of the most forgiving big projects you can take on. There is no box spring to support, no lift hardware to size and no moving parts. A platform bed is a frame with a slatted deck that holds the mattress directly, and the form is simple enough that a first-time builder who can follow flat-pack instructions can finish one over a weekend. This guide covers the method, with a queen as the main example, and answers a question that comes up constantly: what about storage?
We will be upfront at the start. The frame described here is the one in our platform bed plans, which is a low, floating Japanese-style bed. It does not include drawers or under-bed storage. If storage is the main thing you want, read the storage section below before you decide. These are generic DIY plans, not engineered drawings.
What a platform bed frame is
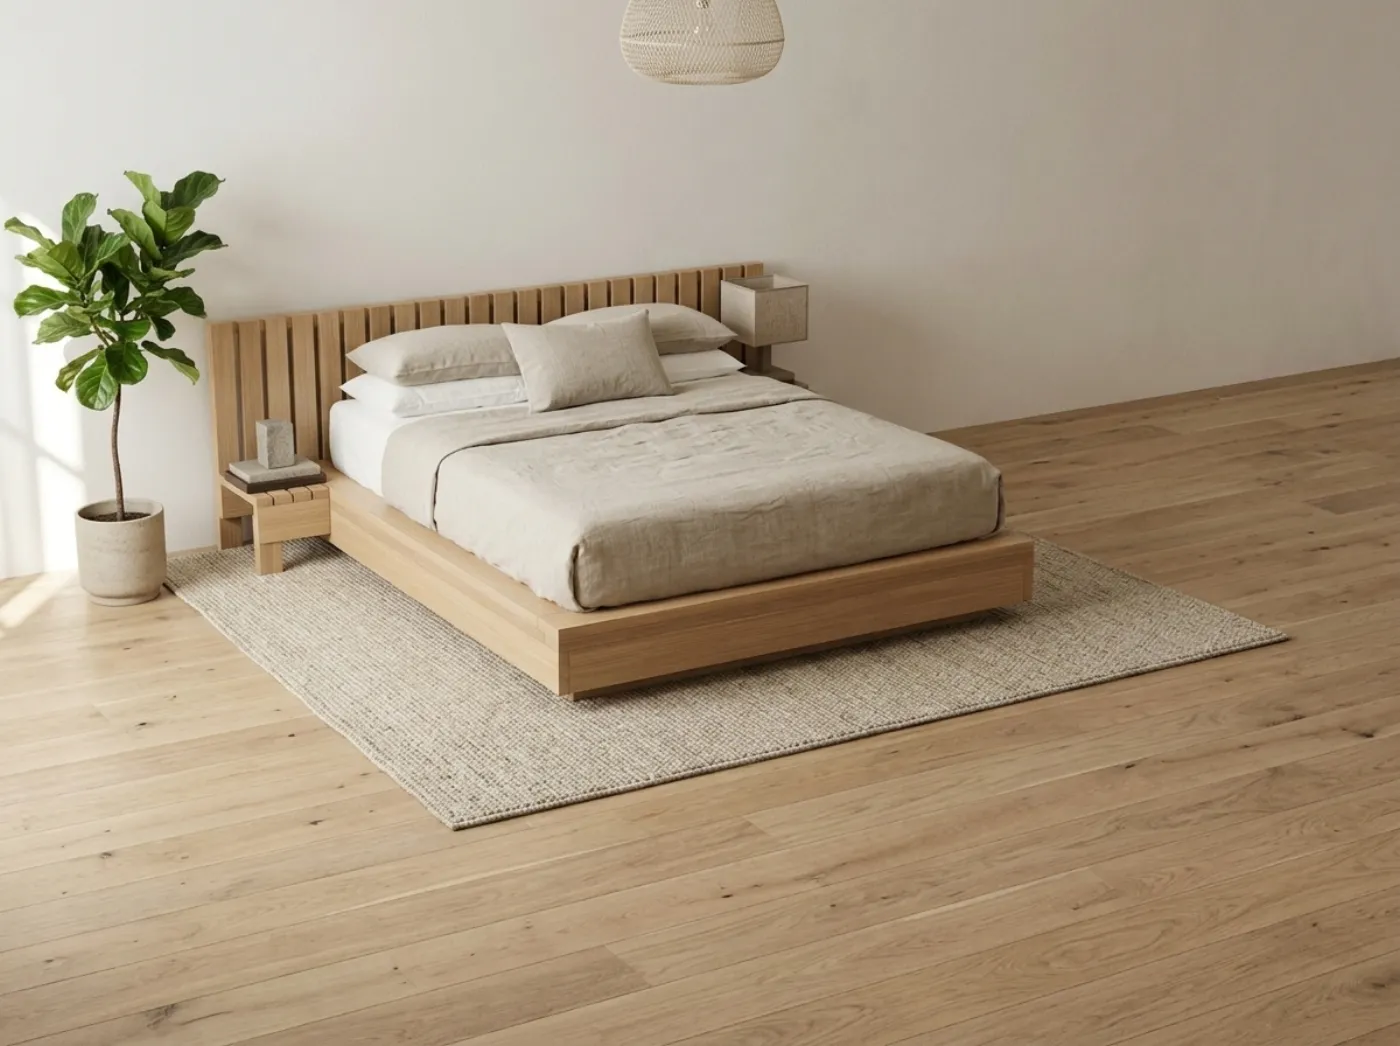
A platform bed replaces the box spring and the metal frame with a wooden structure that does both jobs. The mattress rests on slats, and the slats rest on rails and a frame. In the plan, the design has three visible ideas:
- A floating look. The deck sits about 10-1/2 in off the floor on a wide frame, which sits on a narrower base set in 4 in, so the bed looks as if it hovers.
- A flat ledge. A ledge about 5-1/2 in wide runs around three sides, 1-1/2 in above the slats, so the mattress is held in place and there is a surface for a book or a glass.
- A tall slatted headboard. The headboard is made of vertical slats and reaches 11 in past the bed on each side, with optional nightstand ledges at both ends.
Every board is a standard 8 ft 2x4, 2x6 or 1x4, and the plan suggests straight, kiln-dried wood such as pine, fir, poplar, ash or oak.
DIY platform bed frame sizes
The plan covers twin, full, queen, king and California king. Queen and wider beds need a center beam on center legs, because a long span of slats cannot carry two sleepers without help in the middle.
| Size | Mattress | Materials estimate |
|---|---|---|
| Twin | 38 x 75 in | about $380 to $550 |
| Full | 54 x 75 in | about $450 to $650 |
| Queen | 60 x 80 in | about $510 to $730 |
| King | 76 x 80 in | about $570 to $820 |
The estimates are at typical US home-center prices and vary by region. They cover materials only, with the mattress, hardware and lumber bought separately. A finished platform bed of this style sells for about $399 to $1,799 in retail listings.
The queen in detail
A queen platform bed is the most searched size, so here are the plan’s numbers. The queen frame is 6 ft wide and 7 ft 4-3/4 in long, and the headboard is 7 ft 10 in wide and 2 ft 10 in high. It is designed for a 60 x 80 in mattress, up to 12 in thick. The plan estimates about 9 to 12 hours of work over a weekend, depending on size.
Tools
You can build a platform bed with ordinary tools.
| Tool | Use |
|---|---|
| Miter saw or circular saw | Cutting rails, legs and slats |
| Drill and driver | Pilot holes and screws |
| Countersink bit | Setting screw heads flush |
| Clamps | Holding rails while you fasten |
| Sander | Smoothing every surface a sleeper touches |
| Tape measure, square, level | Layout and checks |
A countersink drill bit set keeps screw heads flush so they do not catch on bedding. For the structural joints the plan calls for coated wood screws, so shop for coated #10 wood screws in the length listed. A random orbit sander saves hours. If you are new to reading a cut list, see how to read woodworking plans and cut lists.
Step by step: how to build a DIY platform bed
The plan has one page per numbered step, each with one clear drawing. The sequence looks like this.
- Pick the size and check the mattress. Measure your mattress, not just the size name. Confirm that its thickness fits within the plan’s 12 in limit, and read the slat spacing your mattress warranty asks for.
- Buy straight, dry lumber. Reject boards with bow, twist or large knots. The frame is only as flat as the boards that go into it.
- Cut all the parts. Work from the lettered cut list for your size. Label each part. Cutting everything first makes assembly fast.
- Build the base. The narrow base is the foundation. Fasten the base rails and joists, and check that the frame is square by measuring both diagonals.
- Build the wide frame. The wider rim sits on the base, set back so the base is hidden in shadow, which creates the floating look. Fasten it with the plan’s frame screws.
- Add the center beam and legs (queen and larger). The beam runs the length of the bed on its own legs. Make sure each leg sits solidly on the floor, and shim if the floor is uneven.
- Fasten the ledge. The ledge goes around three sides, 1-1/2 in above the slats.
- Install the slats. The plan keeps every gap under 3 in. Some mattress makers ask for less, so check your warranty and add slats if needed.
- Build and attach the headboard. Follow the plan’s drawing for how the vertical-slat headboard is fastened, since people will lean against it.
- Sand and finish. Round every edge a sleeper might touch, then finish.
- Check every screw. Tighten each one before the mattress goes on.
Slats, spacing and your mattress
The deck of a platform bed is only as good as its slat spacing. Foam and hybrid mattresses can sag between widely spaced slats, and some warranties exclude damage in that case. The plan keeps every gap under 3 in, and the plan notes that some mattress makers ask for less. So before you build, look at your mattress paperwork, and if the maker’s number is tighter than the plan’s, add slats. This is a small change, and it costs little.
DIY platform bed with storage: an honest answer
People search for a DIY platform bed with storage, and it is fair to ask whether this frame supports it. The honest answer is no, not in the way you might hope. Our plan is the low floating frame. Storage is not included, and there are no drawers, no lift-up deck and no built-in bins.
That is a deliberate design trade. The floating look depends on a low, slim base and open shadow under the frame. Adding drawers would change the look, the structure and the cut list. The plan has no instructions for it, and we will not pretend otherwise.
If storage matters to you, there are sensible options:
- Choose a different design. A storage bed with drawers or a lift-up deck is a different project, with its own plan.
- Use the space under the frame as it is. Depending on the clearance beneath your frame, flat under-bed storage bins could fit. Measure the clearance in your finished frame first, since the floating base is set in and the opening is low.
- Add storage elsewhere. Nightstand ledges at both ends of the headboard give you a place for the things you need beside the bed, and the tall headboard leaves room for shelving on the wall.
If you modify the frame yourself to add drawers, treat it as your own design: you take on the structural decisions, and the plan’s member checks no longer apply.
Finishing
A bed is touched constantly, so use a finish that is smooth and durable. Wood conditioner on pine reduces blotching, a water-based clear coat keeps the color light, and a wipe-on oil gives a more natural feel. Let every coat cure before the mattress goes on, since fresh finish can stick to fabric and smell. For color ideas on softwood, see how to make pine look like white oak.
Safety
A bed frame carries people for hours at a time, so a few points are worth stating plainly.
- Check the center beam and legs on queen and larger sizes. Do not leave them out to save money.
- Use the screws the plan lists, coated wood screws in the sizes named, not whatever is in a drawer.
- Pre-drill near board ends to avoid splitting.
- Wear eye and hearing protection when cutting, and a dust mask when sanding.
- Round or ease every edge that skin might touch, and bury or plug screw heads.
- Inspect once a year. The plan includes a yearly check log. Retighten screws and look for cracks.
- Lift with a helper. A queen frame is bulky, even if each part is light.
What it costs
For a queen, the plan estimates about $510 to $730 in materials, against retail platform beds of this style at about $399 to $1,799. The saving depends on which version you compare to, and the plan builds a solid-wood frame rather than a cheaper composite. For a closer look at the numbers, see the build cost page and our platform bed cost article.
Where the plan fits
This guide explains the method, but a plan gives you the numbers. The platform bed plan is a digital download at $9.99 and includes a size picker, a mattress and slat sheet, a tools and hardware page, and for each size the finished piece and its parts with a cut list, one page per numbered step and a shopping list. It also includes finishing and care, a budget planner, a yearly check log and a quick-reference card. It is made for first-time builders who can follow flat-pack instructions. See it on the Low Platform Bed page.
Summary
A DIY platform bed frame is a base, a wider frame, a ledge, a slatted deck and a tall headboard, built from standard 2x4, 2x6 and 1x4 boards. Queen and larger sizes need a center beam and legs. Check your mattress warranty for slat spacing, finish the frame well, and remember that this particular plan is the low floating design and does not include storage.