DIY Wooden Play Kitchen vs Buying One: Real Cost of Building
A wooden play kitchen costs about $340 to $490 in materials to build, against $349 to $599 for finished ones. Here is where building pays and where it does not.
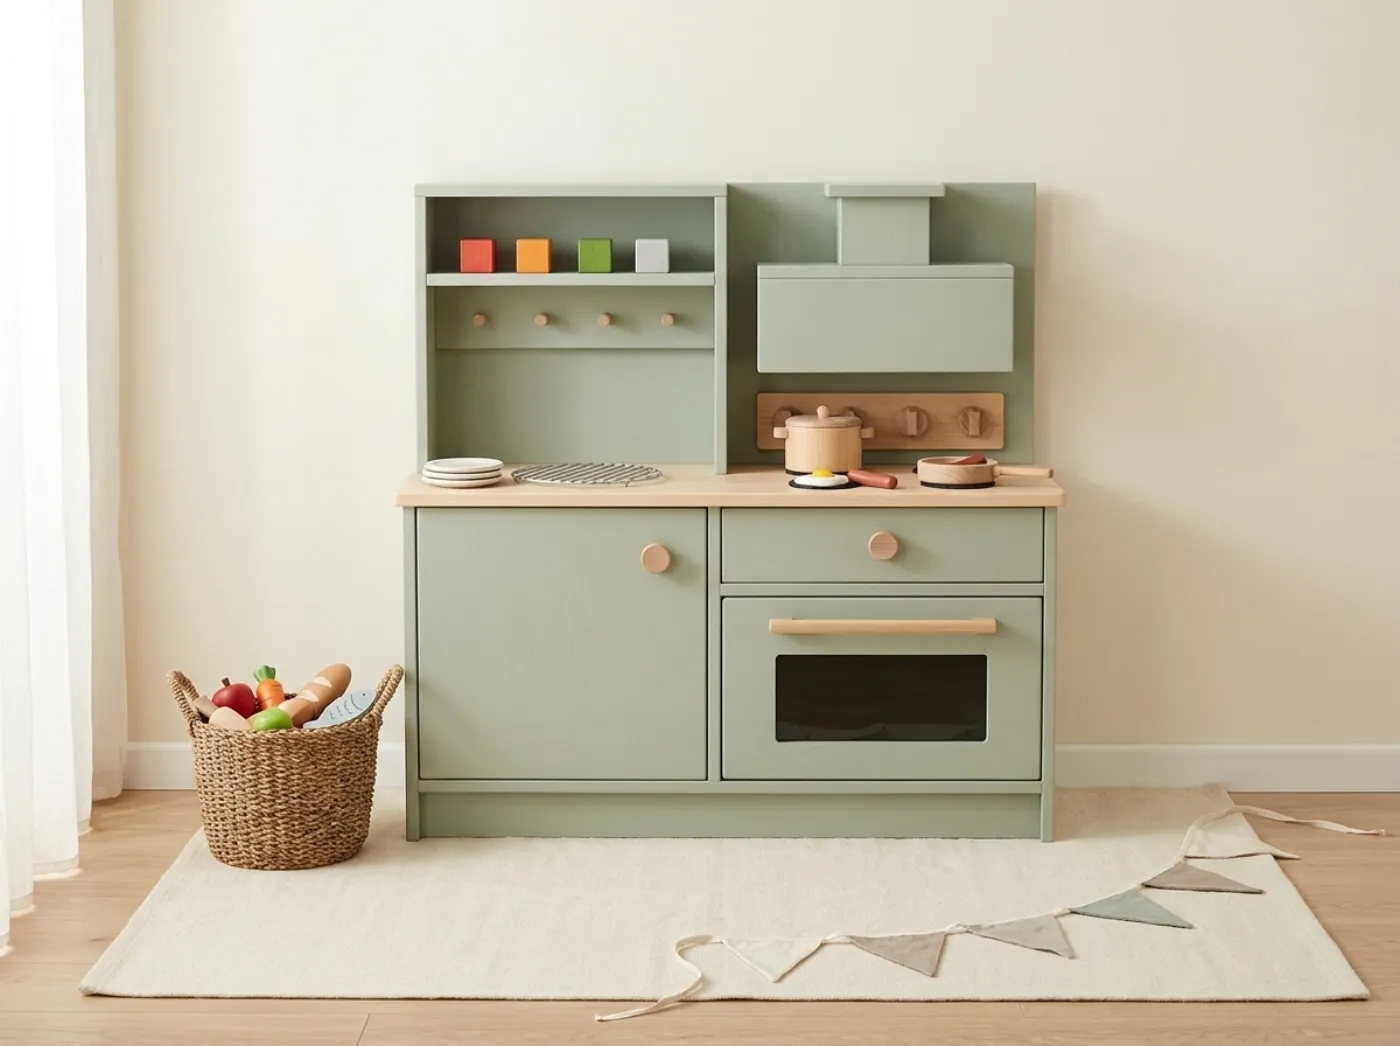
A solid wood play kitchen with an oven door, sink, drawer and open shelves costs about $422 in materials to build, with a realistic range of $340 to $490. Comparable finished wooden play kitchens in the painted catalog style, sold through catalog retailers and showrooms, run about $349 to $599. That means the two ranges overlap heavily. If you are building purely to save money, this is the project where you should do the math carefully, because the savings are modest and sometimes zero.
There are good reasons to build one anyway, and we will go through them. But the headline is simple: building a play kitchen from cabinet-grade plywood is closer to a quality choice than a bargain.
Materials estimates are at typical US home-center prices and vary by region.
Where the money goes
Our Cottage Play Kitchen plans call for two sheets of 3/4 in sanded birch plywood and a few 1x4 and 1x6 boards, plus a surprising amount of hardware and finish. Here is the breakdown, rounded:
| Category | What is in it | Estimated cost |
|---|---|---|
| Lumber | Two 1x4 boards, two 1x6 boards | $52 |
| Sheet goods | Two sheets of 3/4 in cabinet-grade sanded birch plywood | $170 |
| Fasteners and glue | Flat-head screws in two sizes, wood glue, screw plugs | $62 |
| Hardware | Hinges, soft-close lid stays, roller catches, wooden knobs and pulls, pegs, felt pads | $49 |
| Safety | Pan-head screws with washers and hollow-wall anchors for wall fixing | $22 |
| Items to buy | A stainless mixing bowl for the sink, black child-safe craft paint | $38 |
| Finish | Water-based primer, enamel in white or sage, clear coat, sandpaper | $29 |
| Total | about $422 |
Plywood is 40 percent of the cost. The finish is a small line ($29) because a play kitchen is small. A few items, such as the optional acrylic oven window, the optional edge banding and the anti-tip strap kit, are not priced in the total, so add a little for them.
Build versus buy
What a finished play kitchen offers. It arrives ready to assemble, sometimes with accessories included, and a warranty and return policy are common. You can get it fast, and a maker can tell you what safety testing it has been through. A home build has none of that paperwork. If a birthday is next week and you have no tools, buying is the right choice.
What the DIY version offers. Real cabinet-grade plywood with a clean edge, a custom color, an oven door with a window that stops softly, a sink cut to your own mixing bowl, a hook rail and shelves that fit your child’s reach. The result is heavy, durable and repairable. It can be painted again for a younger sibling. Cabinet-grade plywood with rounded edges is a sturdy material, and a kitchen built this way is a substantial object.
Where the numbers land. A $422 build against a $349 to $599 purchase is a toss-up on price. The tipping point is quality and customization, not savings. If the finished ones you are looking at are the thin, flat-pack kind near the bottom of the range, the DIY version will be better made but may cost the same or more. If you are looking at the premium solid wood versions near $599, building is a bit cheaper and equal in material.
The time cost. The plans estimate about 13 hours of work over a weekend, plus a few days for the paint to cure. That is the real price of the project.
What moves the price
Plywood grade
The plan calls for 3/4 in sanded birch plywood, cabinet grade, at about $85 per sheet in the estimate. Using a cheaper sanded pine or a paint-grade sheet can cut that line, though birch gives you crisp rounded edges and takes paint well. Prices vary a lot by region, so check your local price before you commit.
Hardware
Soft-close lid stays rated for 10 lb or more make the oven door fold down gently and hold it level. They are a modest cost ($18 for the pair) and a real quality feature. Look for soft close lid stay hinges to match the 6 in size in the plans. The plans specify nylon roller catches and no magnets, so look for nylon roller catches, and choose wooden Shaker pegs and wooden knobs for the hook rail and stove knobs.
Finish
The plans call for water-based, low-VOC primer and enamel labeled child-safe, plus a clear polyurethane or hardwax oil labeled safe for toys on the counter. Use child-safe water-based enamel and read the label for the cure time, because a finish that is dry to the touch is not cured. Let paint cure for the full time before a child uses the kitchen.
Edge banding
Plywood edges show on a painted kitchen. Optional iron-on birch edge banding gives a cleaner edge if you plan a clear-coated counter. It is optional in the plans and not in the total.
The sink bowl
The sink cutout is sized to a common stainless mixing bowl, about 4 qt and 9-1/2 in across the rim. The plans include a measuring method, because bowls differ. Buy the bowl before you cut the hole.
The hard parts and how the plans handle them
Plywood layout. Two sheets must yield every large part. The plans include a plywood cutting diagram so that you waste as little as possible. A track saw or circular saw guide helps make clean cuts, and sanded plywood chips if you cut it badly, so use a fine-tooth blade.
Rounded corners. All corners are rounded and there are no small parts, which is a child-safety feature. The plans have a dedicated Round every corner sheet. Rounding takes time with a sander or router.
The oven door. A door hinged at the bottom with a window and a soft stop. The plans cover the hinge and stop positions and the optional acrylic window, 1/8 in thick, 15 x 7 in.
The sink cutout. Cut to fit your bowl. A jigsaw with a fine blade does the job; drill a starter hole at a corner and sand the edge smooth.
Fixing it to the wall. The kitchen is 40 in wide, 13 in deep and 38 in tall, a top-heavy shape for its depth. The plans include pan-head screws with washers and hollow-wall anchors, plus an anti-tip strap kit. Use them. Buy a furniture anti-tip strap kit, which the plans list but the total does not price. These are generic DIY plans, not engineered drawings, and anything built for a child should be checked for loose parts, sharp edges and stability before each use.
Safety for a child’s piece
The plans include a Safety and child-safe finish sheet. The key points: every corner is rounded, there are no small parts, the finish is low-odor and labeled for toys, and the unit is fixed to the wall. The kitchen is designed for ages 3 and up. Check screws and hinges regularly, which the plans’ check log supports. If a knob or a peg works loose, fix it right away.
Time, tools and skill level
The plans are written for first-time builders who can follow flat-pack instructions. Numbered steps with one drawing each, a lettered parts list and a cut list guide you through. You will need a saw, a drill, a jigsaw, sandpaper, clamps and a countersink bit for the plywood joints, which are pre-drilled and counterbored with wooden plugs over the screws. A pocket hole jig is not required here.
Expect about 13 hours of work, then a few days for paint to cure fully.
Size
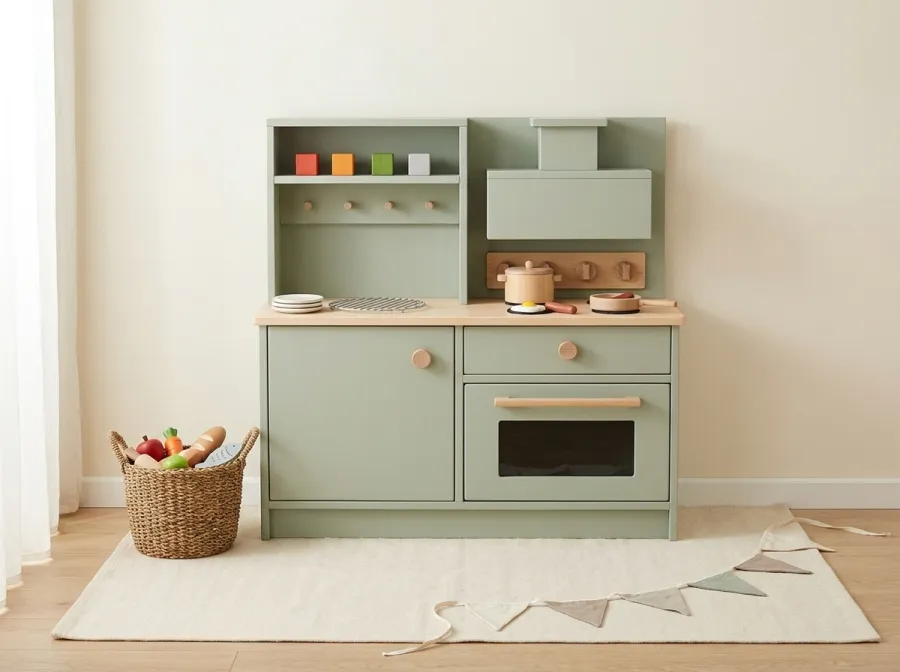
One size comes in the kit: 40 in wide, 13 in deep and 38 in tall, with a counter about 21 in high. It has a painted base in white or sage, a light wood counter with four painted burners, an upper backsplash with two shelves, a hook rail, a faux range hood and four knobs. Check the counter height against your own child before you commit.
Making the most of the build
If you do build, a few choices improve the result without adding much cost. Buy the bowl and the hinges before you start, so that the dimensions you cut to are real ones. Sand the plywood before you assemble it, when you can reach every face, and break each edge with fine paper even where the plans do not round it. Prime the raw edges well, because plywood edges drink paint. Paint the base and the backsplash before the final assembly where the plans allow it, since cutting in around shelves and a hood is slower than painting flat parts. Use two thin coats of enamel with light sanding between, and give the counter its clear coat last so that no paint drips on it.
Think, too, about the play value. The oven door, the drawer, the hooks and the open shelves are the parts a child will use most, so spend your time getting them to work smoothly. A drawer that sticks or a door that slams will frustrate a child far more than a slightly uneven paint line. Test each moving part with a small hand, not an adult one, and remember that the kitchen will be pushed, leaned on and loaded with pots.
Finally, decide where it will live. A play kitchen takes more floor space than it looks, and a wall that is out of the traffic path, with a stud behind the anchor points, makes the safety fixing simple.
Paint colors and cure time
The plans offer two painted-base colors, white and sage, with a light wood counter. White hides little and shows scuffs; sage is more forgiving of small hands. Whichever you choose, the clear coat on the counter takes the most wear, so apply it carefully and let it cure for the full time on the label. Water-based finishes can feel dry within hours but stay soft for days, and a child who bangs a toy pot on a soft counter will dent it. Plan the build so that painting finishes a week before the kitchen is needed, and keep it in a ventilated room while it cures.
Is it worth building?
Build it if you want a better-made kitchen than the middle of the retail range, a custom color, or a piece that can be handed down. Do not build it if your goal is to spend less than the cheapest finished kitchen, because it will not. The honest comparison is $340 to $490 for a solid birch build against $349 to $599 finished. The build-cost hub shows projects where the savings are larger.
Where to go next
The Cottage Play Kitchen plans cost $12.99 and run 57 pages. They include a plan at a glance, bowl measuring guidance, a corner-rounding sheet, the plywood cutting diagram, a cut list, one page per step, a safety and child-safe finish sheet and a budget planner. If you plan to build a playhouse next, the complete collection bundles every plan for $129. Measure your bowl first, then open the play kitchen plans and decide whether the build suits you.